

League of Legends has earned itself a spot amongst some of the most competitive games known to man. However, while Summoner’s Rift does have a reputation for being a rabbit hole, there are much deeper trenches that have yet to be explored.
Take ARAM as an example; it’s a simple 5v5 that focuses on improving your teamwork as much as possible. There are no lanes, no jungles, no neutral objectives. Just take the turrets, the inhibitor, and claim the nexus for a swift victory!
Unsurprisingly, it’s not as simple, and for a very good reason. So, in this guide, let’s focus on ARAM: one of the most unevolved versions of League of Legends, and how you can thrive in it to become the best!
show
Explaining The Fundamentals: How Does ARAM Work?
ARAM at its core is quite one-dimensional. You have a 5v5 setting on an ancient bridge that serves as a single lane. There are two sites, one is Team Order, and the other is Team Chaos.
On both sides, lie two turrets, an inhibitor, and a nexus. Just like in the classic Summoner’s Rift mode, the objective is to destroy the enemy’s structures and claim their nexus. However, the mechanics and strategies used in ARAM can be quite different due to the unique constraints of the mode.
Next comes the gold generation aspect. The more gold you obtain, the more items you can get. Items give you stats, and you can use those stats to compete against the enemy champions. Naturally, taking enemy units down also rewards experience points.
The strategy starts with a random champion selection, which makes every ARAM match a new learning experience. Unlike the classic mode, where you can select your champion, in ARAM, you get a random one from your pool, including those you may not be familiar with. This randomness keeps players on their toes and forces them to adapt their playstyle.
The Champion Select, and The AR Aspect
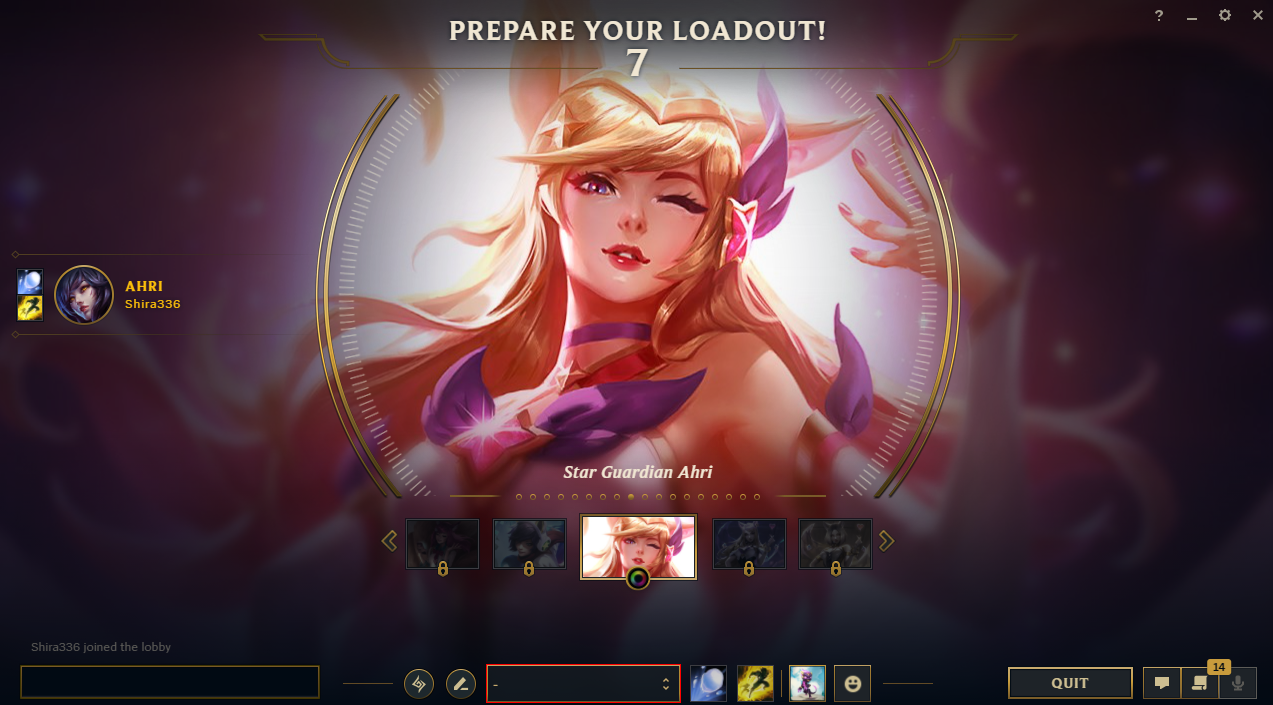
The Champion Select in ARAM is a completely random selection from your pool of champions, including all champions that are free-to-play at the time. The acronym ARAM stands for “All Random, All Mid,” and the first part of this – “All Random” – refers to this feature of champion selection. Each player is automatically assigned a random champion. If you’re not satisfied with your choice, you can reroll it using reroll points that accumulate over time or trade with a teammate who agrees.
The “All Mid” part of ARAM refers to the single, middle lane of the map where all action takes place. Unlike in the standard Summoner’s Rift mode, there is only one lane and no jungle, so all champions are constantly engaged in team fights.
The AR aspect – “All Random” – brings a significant layer of uncertainty and excitement to the game. You never know which champion you’ll get and it might not be one that you’re familiar with. This unpredictability tests your adaptability, knowledge of different champions, and your ability to use that champion’s abilities to their maximum potential.
To excel in ARAM, you must be adaptable and quick-thinking, making the most out of the champion you receive, and working cohesively with your team to control the middle lane. The constant team fights require you to have a good understanding of all the champions, not just those you prefer, and can thus vastly improve your overall skills and understanding of the game.
Therefore, while it might seem simpler, the ARAM mode can actually be a great way to improve your skills, knowledge, and adaptability in League of Legends. It encourages strategic thinking, teamwork, and a broad understanding of the game’s mechanics and champions.
Champions in ARAM: Minor Changes and Reworks

In ARAM, every champion is subjected to minor changes or reworks to balance their performance based on their teamfight prowess. Riot Games has implemented this in an effort to ensure the most fun and fair play, given the unique nature of ARAM.
Traditionally, champions that excel in team fights tend to dominate the Howling Abyss, the map on which ARAM is played. These champions, with their AoE (Area of Effect) spells or their high survivability, have an inherent advantage in the constant team fight environment of ARAM. On the other hand, champions who excel in duels or smaller skirmishes can struggle to make an impact in this mode.
To address this, Riot Games has implemented balance changes specifically for ARAM. These changes can take the form of a buff, a nerf, or sometimes, even a rework of some of the champion’s abilities, only for this specific game mode. The goal is to try to level the playing field as much as possible, making every champion a viable pick regardless of their usual role or strength in a standard Summoner’s Rift game.
In these tweaks, champions that are generally stronger in ARAM receive nerfs, which could include reduced damage output or increased damage intake. Conversely, champions that are weaker in ARAM receive buffs, like enhanced healing or damage output.
The changes are fluid, with regular updates based on the champions’ performance in the game mode, and this ensures ARAM remains balanced, fun, and unpredictable, true to its nature.
For a complete understanding of these champion adjustments, please refer to the following table. It provides a detailed breakdown of the specific changes made to each champion when playing in ARAM.
| Champion | Damage dealt | Damage received | Other effects |
| Aatrox | +5% | +5% | Tenacity => +20% |
| Akali | +5% | -10% | Energy regeneration => +20%, Tenacity => +20% |
| Akshan | +5% | -5% | Going Rogue Scoundrel duration reduced to 25 seconds |
| Alistar | -5% | +10% | Healing done => -20% |
| Amumu | +5% | ||
| Anivia | +5% | ||
| Annie | -5% | +5% | Shielding done => -20% |
| Ashe | -15% | Ability haste => -30, Total attack speed increased by 2.5% | |
| Aurelion Sol | Ability haste => -20 | ||
| Azir | -5% Ability haste increased by 20, Total attack speed increased by 2.5%, Arise! | ||
| Bard | +15% | -15% | Healing done => +20%, Traveler’s Call Chime spawn rate changed to every 30 seconds |
| Bel’Veth | +5% | Death in Lavender, Enhanced Void Corals spawn from nearby turrets being destroyed | |
| Brand | -5% | +10% | |
| Caitlyn | +5% | ||
| Camille | +5% | -5% | Shielding done => +10%, Healing done => +20% |
| Cho’Gath | +5% | ||
| Corki | -10% | Hextech Munitions first package spawn time reduced to 5:00, package cooldown reduced to 150 seconds | |
| Dr. Mundo | -10% | +10% | Healing done => -10% |
| Draven | +5% | -5% | |
| Ekko | +10% | Tenacity => +20% | |
| Elise | +5% | -10% | Tenacity => +20% |
| Evelynn | +10% | -10% | Tenacity => +20% |
| Ezreal | +3% | ||
| Fiddlesticks | -5% | +5% | |
| Fiora | -5% | ||
| Fizz | +5% | -5% | Tenacity => +20% |
| Galio | -5% | +10% | |
| Gangplank | Parrrley: Passively gains 1 Silver Serpent per second | ||
| Garen | -5% | Courage: Bonus resistances on-kill changed to 0.5, Number of enemy kills needed to reach the maximum amount changed to 60 | |
| Gnar | +5% | -5% | |
| Gragas | +5% | -5% | |
| Gwen | +5% | ||
| Hecarim | +5% | -5% | Healing done => +20% |
| Heimerdinger | -10% | +10% | |
| Illaoi | -5% | +5% | |
| Irelia | Ability haste => +20 | ||
| Ivern | -10% | Shielding done => -20% | |
| Janna | -5% | +5% | Shielding done => -10%, Healing done => -10% |
| Jarvan IV | -5% | ||
| Jax | +5% | -3% | |
| Jhin | -10% | ||
| Jinx | -5% | +5% | |
| K’Sante | -10% | ||
| Kai’Sa | -5% | Total attack speed increased by 2.5% | |
| Kalista | +10% | -10% | Total attack speed increased by 2.5% |
| Karma | +5% | Shielding done => +10% | |
| Karthus | -10% | +5% | Death Defied duration changed to 5 seconds |
| Katarina | Tenacity => +20%, Ability haste => +10 | ||
| Kayle | -5% | +3% | |
| Kayn | Healing done => -20%, Tenacity => +20% | ||
| Kennen | -5% | Energy regeneration increased by 20% | |
| Kha’Zix | +5% | -10% | Healing done => +20%, Tenacity => +20% |
| Kindred | +10% | -10% | |
| Kled | +5% | ||
| Kog’Maw | -12% | +10% | |
| LeBlanc | +5% | -10% | Tenacity => +20%, Ability haste => +20 |
| Lee Sin | +5% | -5% | Shielding done => +20%, Healing done => +20%, Energy regeneration increased by 20% |
| Leona | -10% | +5% | |
| Lillia | -10% | +5% | |
| Lissandra | -5% | ||
| Lucian | +5% | -5% | Tenacity => +20% |
| Lulu | +5% | Shielding done => +10% | |
| Lux | -15% | +10% | Shielding done => -20% |
| Malzahar | -10% | +10% | |
| Maokai | -20% | +5% | Healing done => -20% |
| Master Yi | -3% | ||
| Milio | Shielding done => -5%, Healing done => -5% | ||
| Miss Fortune | -10% | +15% | |
| Mordekaiser | -5% | ||
| Morgana | -6% | +5% | |
| Nami | +5% | Healing done => -5% | |
| Nasus | -5% | +5% | Siphoning Strike per-kill stacks increased to 6, per-large-kill stacks increased to 24 |
| Nautilus | -5% | +8% | |
| Nidalee | +10% | ||
| Nilah | -5% | Healing done => -10% | |
| Nocturne | +10% | -15% | Healing done => +20% |
| Nunu & Willump | +10% | -10% | Shielding done => +20%, Healing done => +20%, Tenacity => +20% |
| Ornn | -10% | +10% | Living Forge: Forging an item puts Living Forge on a 120-second cooldown |
| Pyke | +10% | -10% | Tenacity => +20% |
| Qiyana | +10% | -10% | Tenacity => +20% |
| Quinn | +10% | -10% | Total attack speed increased by 2.5% |
| Rek’Sai | -15% | Healing done => +20%, Tenacity => +20% | |
| Rell | -5% | +5% | Shielding done => -10%, Healing done => -10% |
| Renata Glasc | -5% | +5% | Shielding done => -20% |
| Renekton | +5% | Healing done => +20% | |
| Rengar | -8% | Tenacity => +20% | |
| Riven | +5% | -8% | Shielding done => +20% |
| Rumble | -5% | ||
| Ryze | +5% | -10% | |
| Samira | -5% | ||
| Sejuani | +5% | -8% | |
| Senna | -6% | +5% | |
| Seraphine | -15% | +20% | Shielding done => -20%, Healing done => -20%, Ability haste => -20 |
| Sett | -10% | +10% | Shielding done => -10%, Healing done => -10%, Ability haste => -20 |
| Shaco | +5% | Jack in the Box: Limited to 6 Boxes active | |
| Shen | +5% | ||
| Shyvana | -5% | -5% | Fury of the Dragonborn: ALTERNATE INNATE – Shyvana gains 1 bonus armor, 1 bonus magic resistance, and 0.05 bonus Fury regeneration whenever a siege or a cannon minion dies within 1400 units range of her, or when she is healed by a health relic’s area of effect on the enemy’s side of the map. She will not gain bonuses if she is dead, even if in range. |
| Singed | -10% | +5% | |
| Sion | -10% | +10% | Shielding done => -20%, Tenacity => -20%, Ability haste => -20, Glory in Death: Life steal reduced to 50% |
| Sivir | -15% | +5% | |
| Skarner | Crystal Spires: Number of Crystal Spires spawned on the battlefield changed to five | ||
| Sona | -5% | +10% | Shielding done => -10%, Healing done => -10%, Ability haste => -20 |
| Swain | -10% | +15% | Healing done => -10% |
| Sylas | +5% | -5% | |
| Syndra | +5% | ||
| Tahm Kench | -5% | ||
| Taliyah | +5% | ||
| Talon | +5% | -5% | Tenacity => +20% |
| Taric | +5% | ||
| Teemo | -10% | +10% | Ability haste => -20, Noxious Trap: Deal 66% damage to minions (50% total) |
| Thresh | Damnation: Each collected soul counts as 2 from 1 | ||
| Tristana | +5% | -5% | |
| Trundle | +5% | Healing done => -5% | |
| Tryndamere | +15% | -15% | Healing done => +40% |
| Twitch | -5% | ||
| Udyr | Tenacity => +20% | ||
| Urgot | +10% | ||
| Varus | -5% | +5% | |
| Vayne | +5% | -5% | |
| Veigar | -10% | +10% | Event Horizon: Cooldown changed to 23 / 21.5 / 20 / 18.5 / 17 seconds |
| Vel’Koz | -5% | +5% | |
| Vex | -5% | ||
| Vi | +5% | -5% | |
| Viego | +5% | -5% | |
| Viktor | -5% | +5% | |
| Vladimir | -5% | ||
| Warwick | +5% | -5% | Healing done => +5% |
| Xerath | -10% | ||
| Yone | +3% | -3% | |
| Yorick | Shepherd of Souls: Deaths required for a grave changed to 5 at all levels | ||
| Yuumi | +5% | Healing done => +10% | |
| Zac | -4% | Healing done => +20% | |
| Zed | -5% | Energy regeneration => +20%, Tenacity => +20% | |
| Zeri | +10% | -10% | Burst Fire: Zeri will start the game with one point already ranked in Burst Fire!, allowing her to allocate the other two to her other abilities. |
| Ziggs | -20% | +20% | Ability haste => -20 |
| Zilean | +5% | -5% | |
| Zoe | +10% | -5% | |
| Zyra | -10% | +5% |
Early Skirmishes and Level 6 Power Spikes
Once you load into the game with your randomly selected champion, you’ll find yourself on the Howling Abyss, the ancient icy bridge that serves as ARAM’s battleground. Here, understanding the pace and rhythm of the game mode becomes crucial, as well as identifying key points of advantage, like early skirmishes and the infamous level 6 power spike.
From the get-go, the game starts at a high tempo. With all ten players funneled into a single lane, early skirmishes are almost inevitable. You’ll need to quickly figure out the best way to utilize your champion’s abilities in these fights, often in ways that differ from the strategies you’d use in Summoner’s Rift.
While these early skirmishes are often based on the basic abilities of the champions, the game dynamic changes when champions start hitting level 6 and unlocking their ultimate abilities. This is often referred to as the level 6 power spike. Some champions have particularly powerful ultimates that can swing a team fight in your favor, or even result in an ace (killing all five members of the enemy team).
However, the level 6 power spike isn’t just about the offensive advantages. Some champions gain significant defensive or utility boosts from their ultimates, enabling them to better protect their teammates or control the battleground.
Workings: The Champion System

The Champion System in ARAM holds some unique aspects that differentiate it from other game modes in League of Legends.
This complexity adds another layer of strategy to the game, where understanding and adapting to these mechanisms can give a significant edge over the competition.
Champion Level and Skill Points
Champions in ARAM start at level 3. This gives them increased base stats and three skill points right off the bat, allowing for more diverse ability strategies from the very beginning.
However, certain champions have exceptions. For instance, Azir starts with 1 point in his Arise! ability and has 2 additional points to allocate, while Zeri starts with 1 point in Burst Fire and has 2 extra points to distribute.
Damage Modifications
In ARAM, champions experience a damage reduction of 15% to 30%, depending on the distance from enemy champions that are further than 1000 units away. This reduction, however, does not apply to damage caused by damage over time or ultimate abilities.
Howling Abyss Aura
Every champion on the Howling Abyss map is imbued with a unique aura, providing several bonuses:
- A boost of 70 summoner spell haste
- Restoration of 0.15% of maximum mana per second
- Passive gain of 5 experience points per second
- Reduction of all outgoing heals by 50%, though this does not affect self-heals
- Omnivamp and life steal against minions is reduced by 40%
Though, if you’re alive and nearby when enemy minions are taken down by any ally other than yourself, you receive 6 gold.
Additional Buffs for Melee Champions
Melee champions receive a few additional perks in ARAM. They are granted 15 bonus magic resistance, and their basic attacks inflict 20% bonus damage against siege and super minions.
Moreover, if they have more ability power, they deal 20% bonus damage against structures.
However, this specific buff is replaced by the generic time-based ARAM buff’s bonus damage to structures when the latter exceeds 20%.
Map Functionalities and Secrets

The map has unique features and mechanics that affect gameplay, and getting to know these can help you maximize your strategies.
The Map Structure:
The Howling Abyss features a single lane, simplifying the gameplay to focus on continuous team fights. There are four turrets in total—two defending the inhibitor and two protecting the nexus.
After the 18-minute mark, champions gain 0% to 25% bonus damage to structures, scaling with minutes.
The Gates and Their Mechanics:
- Base Gate: At the start of the game, a base gate prevents champions from leaving the base for the first 15 seconds, ensuring fair gameplay.
- Frost-Gates: Once the base gates fall, frost-gates appear in front of each team’s Nexus. Champions can interact with these gates to initiate Frostgate Warp. This involves a 0.75-second channel, followed by a 2.25-second dash to the other side of the gate.
During this dash, champions are untargetable and unable to act. If the channel is interrupted, the gate goes on a 1.5-second cooldown. Frost-gates have a 15-second cooldown after being activated.
- Leading Gates: These are static gates located in front of the outer turret. If the outer turret is destroyed, the leading gate is moved to the front of the inhibitor turret. These gates are not interactable.
Health Relics:
Four health relics are placed in front of the outer towers, with two on each team’s side. Picking up a relic restores 8% of missing health and mana.
It also triggers a beam of light that, after 2.5 seconds, restores 16% of missing health and mana for all champions within the area. These relics can turn the tide in team fights.
Shop and Recall Mechanics:
Recalling is disabled in ARAM, but the recall animation still plays. The fountain doesn’t provide any restoration to champions.
The shop is disabled once champions move too far from the fountain, and it only becomes available again after death. The shop becomes inaccessible slightly past the range of the Nexus turrets.
Surrendering:
A unanimous surrender is enabled at the 8-minute mark, while a standard surrender vote is enabled at 12 minutes.
Minions: Core Differences

Minions play a crucial role in tipping the scales in favor of your team. Understanding their mechanics and behavior can be a game-changer.
Let’s discuss some of the fundamental aspects and alterations that apply to minions in ARAM.
Reduced AoE Damage Impact
In ARAM, minions are more resilient against area of effect (AoE) damage. They only take 75% of the damage inflicted by AoE abilities.
This unique feature can significantly influence the game’s pace and your strategic planning. When clearing minion waves, it’s beneficial to factor in their increased toughness against AoE damage.
Wave Spawn Rate
Minion waves in ARAM are on a faster cycle compared to the traditional mode. Waves spawn every 25 to 13 seconds, decreasing as the game progresses.
This rapid spawn rate demands increased lane control and vigilant wave management from players.
Enhanced Mobility
As the game evolves, minions become speedier, beginning at 325 and eventually reaching up to 425 movement speed.
This increase in speed forces teams to respond more rapidly to advancing minion waves and encourages a faster-paced game.
Siege Minions
Siege minions become a part of the equation from the third wave onward, appearing every two waves.
They introduce an added layer of complexity and strategic opportunities, making wave management more critical.
Empowerment Through Blackout
Siege minions and super minions in ARAM have a unique passive effect, “Blackout.” This passive grants them True Sight, revealing and exposing all stealthed traps within 1100 units when a Noxious Trap is nearby.
This effect lasts for 4 seconds after the trap is no longer in proximity. This passive ability adds a strategic depth to the game, requiring players to consider their placement of traps and their responses to opposing traps.
The Bounty System and Death Timers in ARAM

In ARAM, mastering the bounty system and understanding death timers contribute greatly to the overall strategy, team dynamics, and the flow of the game.
Understanding the Bounty System
In ARAM, just like other modes in League of Legends, champion eliminations contribute to your gold count.
However, consecutive kills and deaths of the same champion can significantly change the bounty. Here is a breakdown:
- Basic champion kill: Grants 180 gold.
- Consecutive kills: The bounty increases based on the number of consecutive kills of the slain champion, as follows:
- 2 consecutive kills: Add 150 gold (total 330 gold)
- 3 consecutive kills: Add 300 gold (total 480 gold)
- 4 consecutive kills: Add 375 gold (total 555 gold)
- 5 consecutive kills: Add 450 gold (total 630 gold)
- 6 consecutive kills: Add 600 gold (total 780 gold)
- Consecutive deaths: The bounty reduces based on the number of consecutive deaths of the slain champion.
- First Blood: Landing the first kill in the game increases both kill and assist bounties by 50%.
- Assists: Assists are worth 90 gold, which is split among all assisting allies. However, this amount is reduced to 50% – 100% based on game time.
This bounty system pushes players to balance between aggression and careful play. On one hand, consecutive kills can increase your gold significantly, but on the other hand, dying repeatedly reduces the reward for your opponents, thus making them less likely to prioritize you.
Death Timers in ARAM
Understanding the death timers is crucial as it determines when you or a fallen ally can return to the battlefield. In ARAM, champion respawn times range from 8 to 40 seconds based on the champion’s level.
This scaling mechanic encourages strategic plays and risk assessment as the game progresses, as deaths in later stages can have a much more significant impact.
Mode-Specific Changes: Items and Summoner Spells

ARAM brings its exclusive items and summoner spells that greatly influence the game dynamics. Let’s delve into them a bit!
Exclusive Items
These special items are unique to ARAM, and they can drastically change your champion’s performance and your overall strategy. Here are a few of my personal favorites:
- Guardian’s Blade, Guardian’s Hammer, and Guardian’s Horn: These items are great for a strong start, providing your champion with some needed early game boosts. Choosing the right one for your champion can give you that early edge in the relentless fight on the Howling Abyss.
- Guardian’s Orb: A perfect choice for mages and ability-based champions. It grants ability power, mana, and cooldown reduction, offering a head start for those magic-fueled champions.
- Poro-Snax: It’s an item solely dedicated to those cute little poros. This automatically occupies the trinket slot, and you’re granted a charge at the beginning of the game, as well as each time your team destroys an enemy turret.
If you’re playing as Braum – you start with two charges! It’s a small and enjoyable feature that makes ARAM what it is – fun and light-hearted, but still competitive.
Summoner Spells
There are a couple of exclusive summoner spells that you might find interesting:
- Clarity: Mana-hungry champions rejoice! Clarity restores a substantial portion of your mana (and some to your allies too), which is incredibly useful in the constant tug-of-war that is ARAM.
- Mark/Dash: This dual-purpose spell allows for some crazy plays. Mark lets you throw a snowball at enemy units, and Dash allows you to dash to the marked enemy, dealing damage.
It adds another layer of dynamism to ARAM, enabling champions without natural dashes or blinks to dive into or out of the fray.
My ARAM Strategy: Simple Yet Effective

I have developed some general strategies that work well with various types of champions. Here’s how I approach the game depending on the role:
Marksmen
In the early stages of the game, my focus is on staying safe and farming. I allow my team to lead engagements while I hang back, concentrating on building up my gold and acquiring key items.
Later in the game, after farming up and staying relatively low-profile, I can leverage my increased damage output to make a significant impact on team fights.
The enemy assassins think “Oh, this guy is useless, we better focus on the more troublesome targets:”, while my team tries to up their game to fill in my gaps.
Mind you, I don’t become “unresponsive”, I do participate, but purposely hold back, just enough that the enemy isn’t turbostomping my team.
Once all the attention is gone, it’s time to enter gosu mode, and give my team the breathing room they deserve.
Tanks
As a tank, my early game is centered around building health regeneration items. This allows me to engage in trades and withstand initial blows without losing too much health, enabling me to stay in lane longer.
As we move into the late game, I transition to a more traditional tank build, with items that boost my durability and crowd control, allowing me to protect my carries and disrupt the enemy team.
Backline is my home, and I’d do anything to reach there. Once the enemy team has been split, I trust my team to take care of the rest, while I try to hang on for my dear life.
Mages
For mana-reliant mages, I start with a Tear of the Goddess and opt for the Clarity summoner spell.
This combo allows me to frequently use my abilities to poke enemies and clear waves, while still maintaining a healthy mana pool.
My role varies based on the situation: if I fall, my carries are still protected, but if they’re taken out, I can step up as a significant damage source.
Ideally, I don’t want to die at any stage of the game. Stopwatch is a god-tier item here. You can bait your enemies, deal damage, and do whatever you want and get little to no punishment in results.
Supports
When playing support, my goal is to divert the enemy’s attention from my carries.
Using crowd control abilities, healing, and shields, I aim to disrupt the enemy’s focus and actions, making it harder for them to target key players on my team.
I take on a proactive, aggressive role to provide space for my carries to deal damage safely. Maybe get a little trash talk going in the all chat as well.
If their main carries are busy responding to you, their focus on the game will waver.
Conclusion
In essence, ARAM – while feeling simplistic, can feel complex once you understand the basics. Almost everything is different here, aside from your champion’s abilities, and the basic purpose of the game.
To make the most out of your ARAM journeys, try to understand when you should be proactive, and when you shouldn’t bother. It’s always going to be a teamfight, so, how well you position is going to matter a lot.
Within the champion select, understand your purpose, and how you’d want to play the game. Plus, with only so many choices in the random rerolls, you need to have a solid mastery over the game to succeed!

 (5 votes, average: 4.40 out of 5)


Muhib, your post really resonated with me! The way you’ve detailed the nuances of the topic is truly commendable. I’ve had a similar experience when I was in New York last year. It was quite an eye-opener. Have you considered the impact of cultural differences in this context? Also, I think it would be interesting to explore the role of technology here. What are your thoughts? Looking forward to your next enlightening piece! Keep up the good work! 😊👍